If you have a boat, then you know the importance of maintaining it and keeping it in proper condition. For that to be possible, the windows need to be in a good condition too, which means that if you have old ones that are well past their time, you will have to replace them.
However, replacing your boat windows may prove to be harder than you thought. With some guidance, it can become less troublesome, though. So, are you ready to take off the boat cover and start working on replacing your boat windows? Here’s what you need to do.
Replacing Boat Windows – Steps to Go Through
1. Remove the Existing Windows
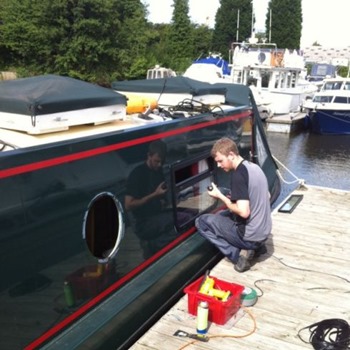 Of course, since you most likely have windows in place in the boat already, you can only add new ones by removing the old ones. So, get ready to remove the windows.
Clamp-style windows are the most common type you can see, as it’s a quite loved installation. Start removing the screws you find on the trim ring, and on the inside of the boat. This will allow the window to be pushed out of the opening when you use your force on it.
There’s usually sealant found under the window flange if you look from the outside of the vehicle, so you will have to release that too. Using a thin, putty knife, work on the outside of the boat, and around the flange you can find outside. Then, pick a window corner and make the flange loose. Once you do that, push the window’s corner out of the hole.
Take the window out of the hole carefully, and after doing so, get rid of any residual sealant you can find on the outside wall.
2. Start Measuring
Assuming you didn’t already buy the new windows, take the measurements for the window holes. What you need to know before doing this is that cleaning up the hole before measuring is a good idea. You don’t want anything to ruin the process and make you take the wrong measurements. Also, before doing so, try to find out if the original line drawings from the boat builder are still available. If the builder is still in business, you can simply make a call and find out.
If there’s none available or you’d rather measure yourself, start measuring the length and width of the holes so you know how big the windows you’ll buy should be. Double-check to ensure they’re accurate before you buy your new windows.
3. Fit the New Windows in the Opening
Once you have your new windows, it’s time to check out whether they fit in the exposed opening or not. If you have someone else around, you may want to ask for their help, as this part is a little difficult to do by yourself.
Insert the window in the opening to verify whether the new windows fit. The exterior window flange needs to overlap the opening in such a way that they form a good seal. Pay attention to that. Also, you should figure out if you will need shims or not. Shims are meant to center the window in the opening, so it’s important to know if you require them or not.
Now, remove the window in order to prepare it to be installed permanently.
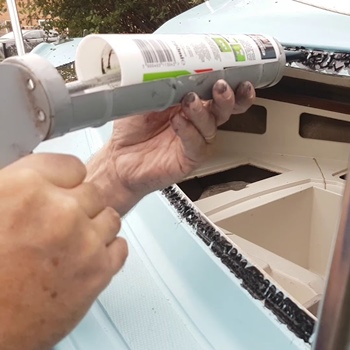
4. Install the Window
It’s time to start the actual installation of the window. Have the windows lying on a flat and soft surface. Take the seal tape and apply it on the flange, by starting at the middle of the window’s bottom. You have to overlap the 2 ends by around ½ inch. Start pulling the backing off the tape.
Also, if you don’t want tape from sticking on the outer wall of the boat, you should use a spray water bottle and mist the opening’s perimeter. The window screen should be removed during installation, as this will make sure it’s not being damaged.
There are some screws coming with the window, and you should use them to fix the window to the opening. Don’t use other types of screws, especially longer ones, because you risk puncturing the frames and causing leaks.
Have another person holding the window in place as soon as you’re satisfied with the final position. You have to then center the clamp ring on the window’s inside part and then install the screws that were given with the products.
Now, you should just install the screen. Insert it into the screen track, and make sure to push and pivot it, so it’s into place. This will complete the installation.
Useful Tips to Remember
 Before you start the process of replacing the windows, though, here are some tips to remember.
- Don’t rush. Installing new windows requires you to be careful and focused, so make sure there’s room for patience before anything else.
- Have someone else close by. You will need help, as installing windows for boats is not an easy task. Especially if your boat is bigger and has larger windows as a result, you’ll be thankful if someone is nearby to help.
- Only use high-quality tools. They have to be the right size for the job, so make sure you get them before the installation.
- Start with the easiest task first. If you have smaller windows in some areas of the boat, start with the smallest one and work your way up to the bigger ones.
- Don’t overdo it with applying force. Excessive force may result in damage and even injury, so even when you need to apply some force, don’t do it more than necessary.
Final Thoughts
Replacing your boat windows becomes a piece of cake as soon as you find out what to do. Follow these steps and tips and the process will be hassle-free.